Skip to: site menu | section menu | main content
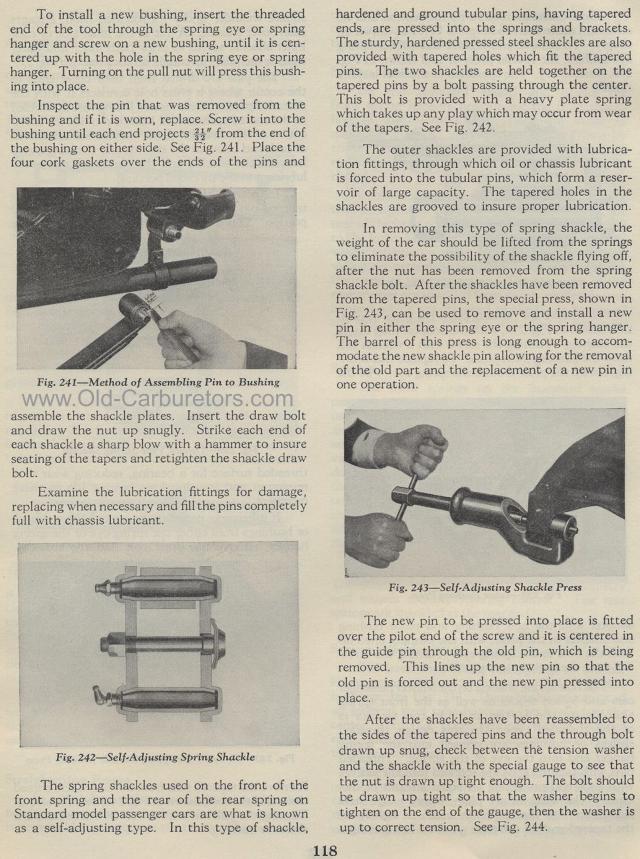
Method of Assembling Pin to Bushing
To install a new bushing, insert the threaded end of the tool through the spring eye or spring hanger and screw on a new bushing, until it is centered up with the hole in the spring eye or spring hanger.
Turning on the pull nut will press this bushing
into place.
Inspect the pin that was removed from the bushing and if it is
worn, replace. Screw it into the bushing until each end projects
32" from the end of the bushing on either side. See Fig. 241.
Place the four cork gaskets over the ends of the pins and
assemble the shackle plates. Insert the draw bolt and draw the
nut up snugly. Strike each end of each shackle a sharp blow with
a hammer to insure seating of the tapers and retighten the shackle
draw bolt.
Examine the lubrication fittings for damage, replacing when necessary
and fill the pins completely full with chassis lubricant.
Fig. 242— Self-Adjusting Spring Shackle
The spring shackles used on the front of the front spring and
the rear of the rear spring on Standard model passenger cars are
what is known as a self-adjusting type. In this type of shackle,
hardened and ground tubular pins, having tapered ends, are pressed
into the springs and brackets. The sturdy, hardened pressed steel
shackles are also provided with tapered holes which fit the tapered
pins. The two shackles are held together on the tapered pins by
a bolt passing through the center. This bolt is provided with a
heavy plate spring which takes up any play which may occur from
wear of the tapers. See Fig. 242.
The outer shackles are provided with lubrication fittings, through
which oil or chassis lubricant is forced into the tubular pins,
which form a reservoir of large capacity. The tapered holes in
the shackles are grooved to insure proper lubrication.
In removing this type of spring shackle, the weight of the car
should be lifted from the springs to eliminate the possibility
of the shackle flying off, after the nut has been removed from
the spring shackle bolt. After the shackles have been removed from
the tapered pins, the special press, shown in Fig. 243, can be
used to remove and install a new pin in either the spring eye or
the spring hanger. The barrel of this press is long enough to accommodate
the new shackle pin allowing for the removal of the old part and
the replacement of a new pin in one operation.
Fig. 243— Self-Adjusting Shackle Press
The new pin to be pressed into place is fitted over the pilot end
of the screw and it is centered in the guide pin through the old
pin, which is being removed. This lines up the new pin so that
the old pin is forced out and the new pin pressed into place.
After the shackles have been reassembled to the sides of the tapered
pins and the through bolt drawn up snug, check between the tension
washer and the shackle with the special gauge to see that the nut
is drawn up tight enough. The bolt should be drawn up tight so
that the washer begins to tighten on the end of the gauge, then
the washer is up to correct tension. See Fig. 244.