Skip to: site menu | section menu | main content
the holes in the end of the beam. Place a cord on each pin and slide a square on the spring seat until it touches the cord. Check from the square to center of the spring tie bolt hole. When the axle is in proper alignment the king pin holes and the hole for the spring tie bolt holes in the spring seats, are all in line.
DO NOT HEAT CHEVROLET FRONT AXLE "I" BEAMS TO STRAIGHTEN. STRAIGHTEN THEM COLD — HEATING WILL CHANGE THE METAL STRENGTH.
Removing and Installing King Pin
To remove and replace the king pin, jack up the front of the car
or truck and remove the front wheel. Remove the nuts which attach
the brake flange plate to the steering knuckle. Remove the brake
flange plate. Remove the top steering knuckle expansion plug. This
can be done with a sharp prick punch. Remove the king pin lock
pin.
Drive the king pin down and out of the bottom with a brass rod.
This removes the bottom expansion plug and the king pin.
In replacing the king pin the operations are just the reverse of
the above removal operations, except that you should always use
new expansion plugs and new lock washers and to clinch over all
cotter pins securely. Drive in the king pin with a soft head hammer.
After the king pin is installed with the thrust bearing assembled
at the bottom of the ping pin with the dust shield side at the
top, check the clearance between the steering knuckle and axle "I" beam.
See Fig. 212. If this clearance is more than .006" install
a steel shim between the steering knuckle and the "I" beam
at the top of the king pin.
Fig. 212— Clearance Between Steering
Knuckle and "I" Beam
In installing this shim, start the king pin in at the top of knuckle
and place shim over the king pin. Mount the knuckle over the end
of the "I" beam and
drive pin part way through the "I" beam. Insert bearing
between the "I" beam and the knuckle and drive king pin
into position.
Remove and Install Steering Knuckle Bushing
A bushing puller should be used in removing steering knuckle bushings.
If a tool of this kind is not available, an ordinary coarse threaded
tap of the proper size can be threaded into the bushing, and with
a bar whose diameter is slightly less than the diameter of the
hole and 1 inch longer than the distance through the steering knuckle.
Drive out the tap and bushing.
To install new bushing, round edges with a file; place in proper
position with respect to knuckle to align oil holes, noting that
the oil hole is nearer one end than the other. Press into place
with a vise or arbor press, taking care to start bushing straight
into the hole. Do not hammer on bushing or other-wise deform it.
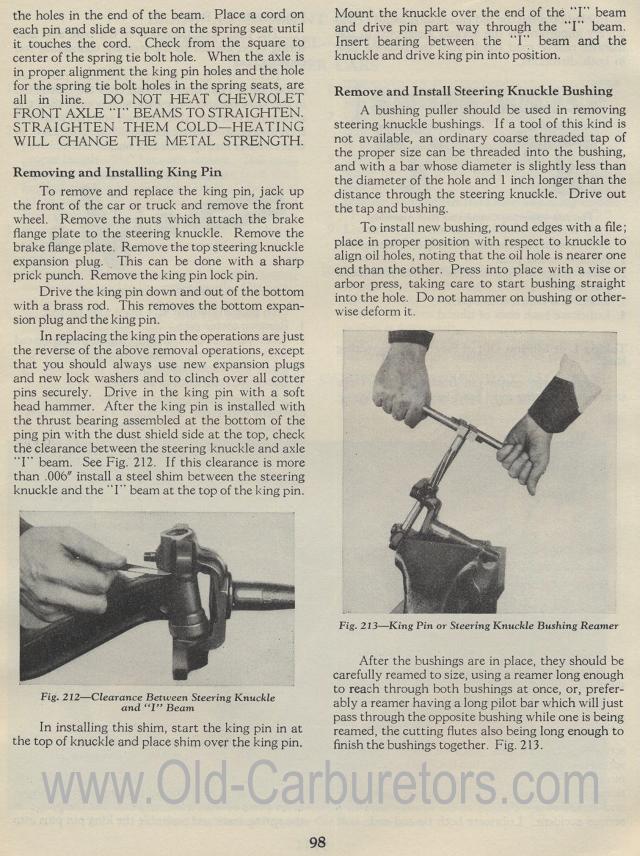
Fig. 213— King Pin or Steering Knuckle Bushing Reamer
After the bushings are in place, they should be carefully reamed
to size, using a reamer long enough to reach through both bushings
at once, or, prefer-ably a reamer having a long pilot bar which
will just pass through the opposite bushing while one is being
reamed, the cutting flutes also being long enough to finish the
bushings together. Fig. 213.
