Skip to: site menu | section menu | main content
To check left steering arm, turn the right wheel in until the pointer on the scale reads 20 degrees. Go to the left side of the car and read the scale on the left turntable, which will indicate the amount of toe-out, which should be 23 degrees.
Checking Toe-In
To check right steering arm, turn the left wheel in until the pointer on the scale reads 20 degrees. Now go to the right side of the car and read the scale, which will indicate the amount of toe-out, which should be 23 degrees.
If the left wheel does not have the proper amount of toe-out,
replace the left steering arm. If the right wheel toe-out is
incorrect, replace the right steering arm.
Repair Operations
This unit will be serviced only as a complete assembly, the component
parts not being serviced separately. When these new assemblies
are obtained from Chevrolet, they will not be filled with shock
insulation fluid and it is necessary that they be filled to their
proper level when they are assembled to the king pin support.
To remove and replace a front spring unit proceed
as follows:
Jack up the car and remove the front wheel. Remove the two bolts
and the lock plate at the bottom of the front spring housing.
Turn the unit outward and then lift off the brake assembly, holding
the radius rod to prevent it from falling and striking the floor.
Remove the steering arm nut with the special wrench available
for this purpose and drive out the steering arm with a brass
drift. Remove the king pin lock pin.
Remove the dust caps and lock rings from the king pin support
yokes. Remove the alemite fittings and assemble the king pin
plug remover in the fitting hole. Attach low pressure gun to
the fitting on the tool and force grease into the king pin until
filled. Then, with plunger on the tool pulled
If the pendulum indicator moves to the left, the right side of
the wheel is heavy or if the indicator moves to the right, the
left side of the wheel is heavy. Starting at the chalk mark or
directly opposite the chalk mark, depending on which side of
the wheel is heavy, place two balancing weights and move them
apart equal distances, until the wheel balances. Lock balancing
weights to rim.
Checking Toe-In and Correction
Set the wheels in straight ahead position and roll the car forward
for at least one revolution of the wheel.
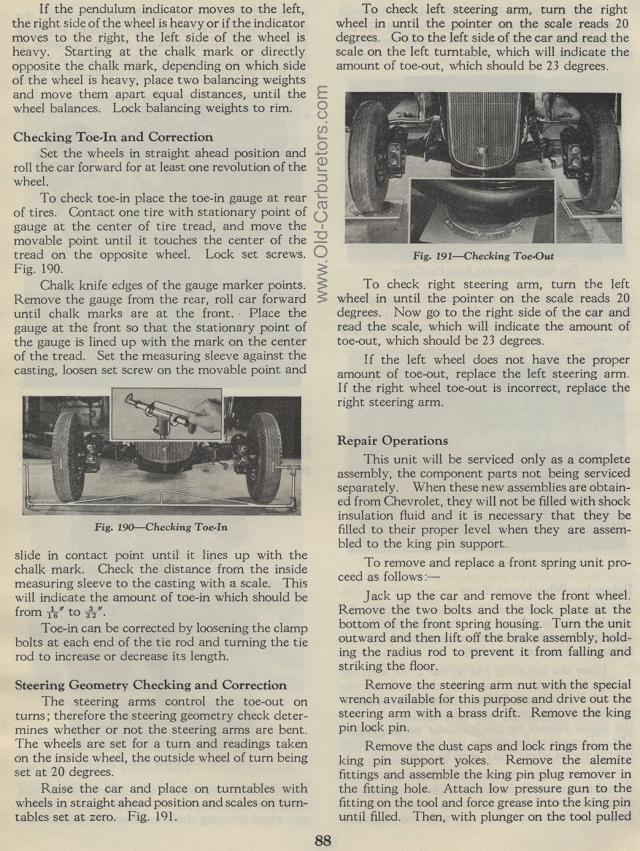
To check toe-in place the toe-in gauge at rear of tires. Contact
one tire with stationary point of gauge at the center of tire tread,
and move the movable point until it touches the center of the tread
on the opposite wheel. Lock set screws. Fig. 190.
Chalk knife edges of the gauge marker points. Remove the gauge
from the rear, roll car forward until chalk marks are at the front.
Place the gauge at the front so that the stationary point of the
gauge is lined up with the mark on the center of the tread. Set
the measuring sleeve against the casting, loosen set screw on the
movable point and
Fig. 190— Checking Toe-In
slide in contact point until it lines up with the chalk mark. Check
the distance from the inside measuring sleeve to the casting with
a scale. This will indicate the amount of toe-in which should be
from is" to a2".
Toe-in can be corrected by loosening the clamp bolts at each end
of the tie rod and turning the tie rod to increase or decrease
its length.
Steering Geometry Checking and Correction
The steering arms control the toe-out on turns; therefore the steering
geometry check deter-mines whether or not the steering arms are
bent. The wheels are set for a turn and readings taken on the
inside wheel, the outside wheel of turn being set at 20 degrees.
Raise the car and place on turntables with wheels in straight ahead
position and scales on turn-tables set at zero. Fig. 191.
