Skip to: site menu | section menu | main content
NOTE— There are three sizes of axle shaft spacers used on each of the rear axles (Master and Standard Models) as follows:
Master Models
1.1485 Wide Across Ground Surfaces.
1.1575 Wide Across Ground Surfaces.
1.1675 Wide Across Ground Surfaces.
Standard Models
1.0105 Wide Across Ground Surfaces.
1.0195 Wide Across Ground Surfaces.
1.0295 Wide Across Ground Surfaces.
You will note that we specify one part number for the two larger
sizes. This is because all four surfaces are ground, while the
narrow or small size has two surfaces ground.
After the proper clearance is obtained between the axle shafts
and the spacer and it is properly installed in its place, assemble
the pinion shaft and lock it in place with the special screw with
a lock-washer under its head.
Replace the axle housing cover with a new cork gasket and fill
the differential to its proper level with the correct grade of
lubricant as shown under the chapter for General Lubrication.
To Remove and Replace Axle Shaft Bearing
The wheel end of the axle shaft is mounted in a Hyatt roller bearing
which is pressed into the axle housing. To remove this bearing
it is necessary to remove the wheels and axle shafts as previously
described and insert the special bearing puller shown in Fig.
146. ,This puller should be assembled
Fig. 146— Axle Shaft Bearing Puller
into the bearing and the axle housing with the jaws of the puller
in a vertical position so as to keep them away from the welding
flash on the inside of the axle housing. This tool not only removes
the bearing but the bearing retainer on the inside and the leather
oil seal on the outside.
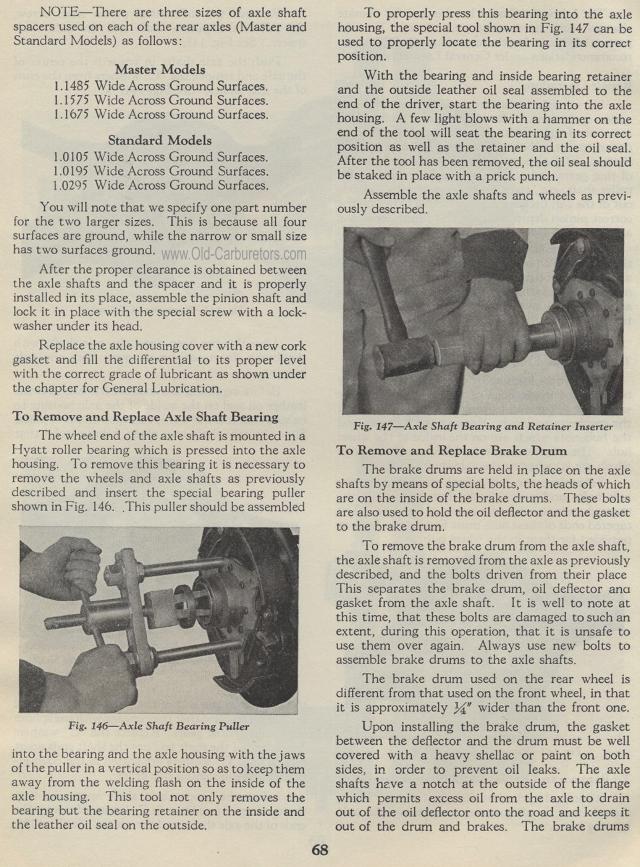
To properly press this bearing into the axle housing, the special
tool shown in Fig. 147 can be used to properly locate the bearing
in its correct position.
With the bearing and inside bearing retainer and the outside leather
oil seal assembled to the end of the driver, start the bearing
into the axle housing. A few light blows with a hammer on the end
of the tool will seat the bearing in its correct position as well
as the retainer and the oil seal. After the tool has been removed,
the oil seal should be staked in place with a prick punch.
Assemble the axle shafts and wheels as previously described.
Fig. 147— Axle Shaft Bearing and Retainer Inserter
To Remove and Replace Brake Drum
The brake drums are held in place on the axle shafts by means of
special bolts, the heads of which are on the inside of the brake
drums. These bolts are also used to hold the oil deflector and
the gasket to the brake drum.
To remove the brake drum from the axle shaft, the axle shaft is
removed from the axle as previously described, and the bolts driven
from their place This separates the brake drum, oil deflector ana
gasket from the axle shaft. It is well to note at this time, that
these bolts are damaged to such an extent, during this operation,
that it is unsafe to use them over again. Always use new bolts
to assemble brake drums to the axle shafts.
The brake drum used on the rear wheel is different from that used
on the front wheel, in that it is approximately %" wider than
the front one.
Upon installing the brake drum, the gasket between the deflector
and the drum must be well covered with a heavy shellac or paint
on both sides, in order to prevent oil leaks. The axle shafts have
a notch at the outside of the flange which permits excess oil from
the axle to drain out of the oil deflector onto the road and keeps
it out of the drum and brakes. The brake drums
