Skip to: site menu | section menu | main content
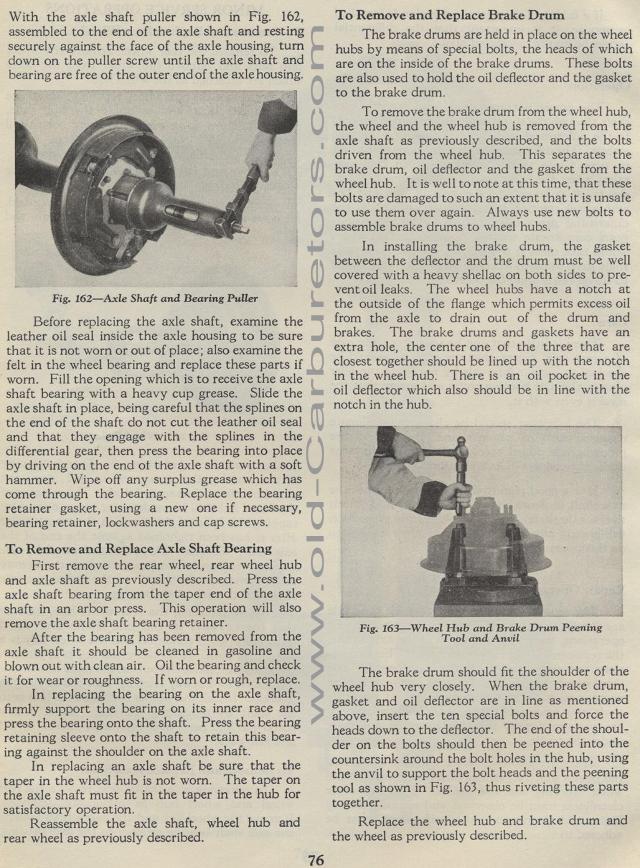
With the axle shaft puller shown in Fig. 162, assembled to the end of the axle shaft and resting securely against the face of the axle housing, turn down on the puller screw until the axle shaft and bearing are free of the outer end of the axle housing.
Axle shaft puller
assembled to the end of the axle shaft and resting securely against the face of the axle housing, turn down on the puller screw until the axle shaft and bearing are free of the outer end of the axle housing.
Fig. 162— Axle Shaft and Bearing Puller
Before replacing the axle shaft, examine the leather oil seal inside
the axle housing to be sure that it is not worn or out of place;
also examine the felt in the wheel bearing and replace these parts
if worn. Fill the opening which is to receive the axle shaft bearing
with a heavy cup grease. Slide the axle shaft in place, being careful
that the splines on the end of the shaft do not cut the leather
oil seal and that they engage with the splines in the differential
gear, then press the bearing into place by driving on the end of
the axle shaft with a soft hammer. Wipe off any surplus grease
which has come through the bearing. Replace the bearing retainer
gasket, using a new one if necessary, bearing retainer, lockwashers
and cap screws.
To Remove and Replace Axle Shaft Bearing
First remove the rear wheel, rear wheel hub and axle shaft as previously
described. Press the axle shaft bearing from the taper end of
the axle shaft in an arbor press. This operation will also remove
the axle shaft bearing retainer.
After the bearing has been removed from the axle shaft it should
be cleaned in gasoline and blown out with clean air. Oil the bearing
and check it for wear or roughness. If worn or rough, replace.
In replacing the bearing on the axle shaft, firmly support the
bearing on its inner race and press the bearing onto the shaft.
Press the bearing retaining sleeve onto the shaft to retain this
bearing against the shoulder on the axle shaft.
In replacing an axle shaft be sure that the taper in the wheel
hub is not worn. The taper on the axle shaft must fit in the taper
in the hub for satisfactory operation.
Reassemble the axle shaft, wheel hub and rear wheel as previously
described.
To Remove and Replace Brake Drum
The brake drums are held in place on the wheel hubs by means of
special bolts, the heads of which are on the inside of the brake
drums. These bolts are also used to hold the oil deflector and
the gasket to the brake drum.
To remove the brake drum from the wheel hub, the wheel and the
wheel hub is removed from the axle shaft as previously described,
and the bolts driven from the wheel hub. This separates the brake
drum, oil deflector and the gasket from the wheel hub. It is well
to note at this time, that these bolts are damaged to such an extent
that it is unsafe to use them over again. Always use new bolts
to assemble brake drums to wheel hubs.
In installing the brake drum, the gasket between the deflector
and the drum must be well covered with a heavy shellac on both
sides to pre-vent oil leaks. The wheel hubs have a notch at the
outside of the flange which permits excess oil from the axle to
drain out of the drum and brakes. The brake drums and gaskets have
an extra hole, the center one of the three that are closest together
should be lined up with the notch in the wheel hub. There is an
oil pocket in the oil deflector which also should be in line with
the notch in the hub.
Fig. 163— Wheel Hub and Brake Drum Peening
Tool and Anvil
The brake drum should fit the shoulder of the wheel hub very closely.
When the brake drum, gasket and oil deflector are in line as mentioned
above, insert the ten special bolts and force the heads down to
the deflector. The end of the shoulder on the bolts should then
be peened into the countersink around the bolt holes in the hub,
using the anvil to support the bolt heads and the peening tool
as shown in Fig. 163, thus riveting these parts together.
Replace the wheel hub and brake drum and the wheel as previously
described.
