Skip to: site menu | section menu | main content
one .002" shim. An equal number of shims should be used on
each side of the bearing, however, if an unequal number of shims
has to be used to properly adjust the bearings, the extra shim
should be on the camshaft side of the bearing.
This adjustment operation should be done one bearing at a time with the other
two bearing caps just drawn down snug, while the bearing cap of the bearing you
are adjusting should be tight.
After all three bearings have been adjusted, the bearing cap bolts should be tightened and the locks assembled. Check fit of the crankshaft. Fig. 26. When the bearings have been properly adjusted, you should be just able to turn the crankshaft by hand.
Camshaft Bearings
The center and rear camshaft bearings are steel backed, babbitt
lined. They are pressed into the crankcase and staked in place
to prevent rotation and endwise movement. They are carefully
Fig. 27— Camshaft Driver Bar and Bushing
reamed at the time of assembly and have slots and holes which line
up with the oil leads in the crank-case to provide lubrication
to these bearings.
To remove and replace the center camshaft bearing, in service,
a set of special tools are necessary. This set of tools consists
of removing and replacing drivers, a reamer for the distributor
shaft hole, reamer, guide bushings and reamer bar and staking tool.
The following is a brief description of the operation of these
tools.
1st Place driver bar and bushing through front camshaft hole and
attach driver. See Fig. 27.
2nd— Drive out old bearing.
3rd— Remove old bearing from driver and assemble to it the
new bearing you are installing.
4th— Assemble alignment bushing and knurled nut to end of
bar. See Fig. 28. This lines up the
distributor shaft hole in this bushing with the hole in the new
bearing.
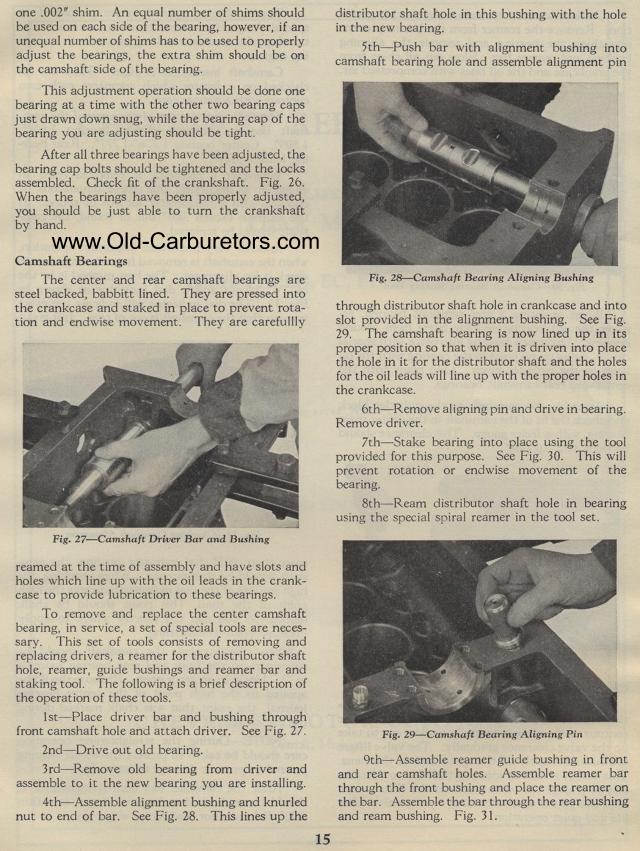
5th— Push bar with alignment bushing into camshaft bearing
hole and assemble alignment pin
Fig. 28— Camshaft Bearing Aligning Bushing
through distributor shaft hole in crankcase and into slot provided
in the alignment bushing. See Fig. 29. The camshaft bearing is
now lined up in its proper position so that when it is driven into
place the hole in it for the distributor shaft and the holes for
the oil leads will line up with the proper holes in the crankcase.
6th— Remove aligning pin and drive in bearing. Remove driver.
7th— Stake bearing into place using the tool provided for
this purpose. See Fig. 30. This will prevent rotation or endwise
movement of the bearing.
8th— Ream distributor shaft hole in bearing using the special
spiral reamer in the tool set.
Fig. 29— Camshaft Bearing Aligning Pin
9th— Assemble reamer guide bushing in front and rear camshaft
holes. Assemble reamer bar through the front bushing and place
the reamer on the bar. Assemble the bar through the rear bushing
and ream bushing. Fig. 31.