Skip to: site menu | section menu | main content
Engine Mountings
Cushion balanced engine mountings, used in the passenger car models, involve an entirely new principle of engine mounting. It completely insulates the occupants of the car from engine vibrations.
Engine Tune-Up
One of the most important duties that service men have to perform
is the tuning of Chevrolet engines. This operation more than any
other deter-mines whether or not the owner will get the maxi-mum
amount of performance with the greatest amount of economy from
his car or truck.
Only by performing these operations and adhering to limits, clearances
and specifications are you able to get the performance and economy
that has been built into the Chevrolet six-cylinder engine.
Engine Tune-Up Instructions
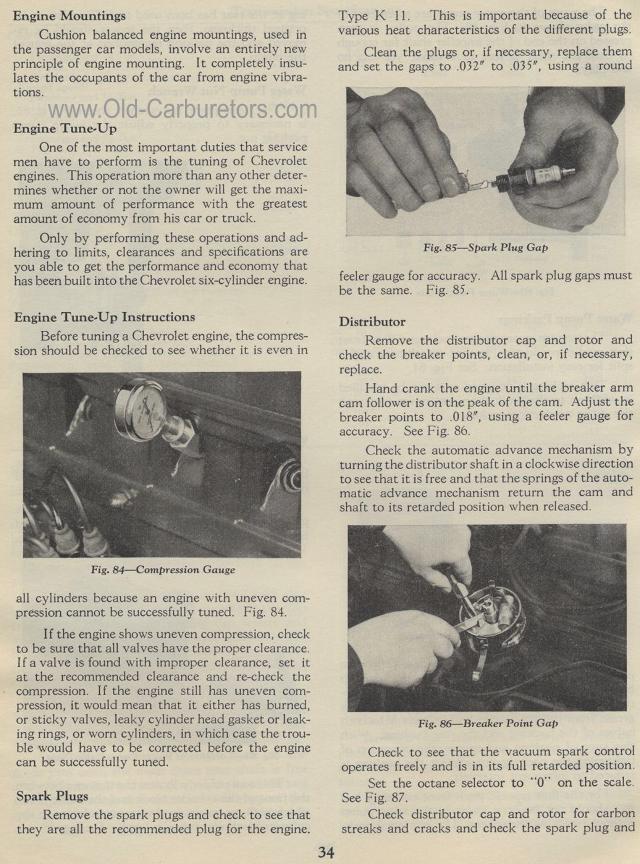
Before tuning a Chevrolet engine, the compression should be checked
to see whether it is even in
Fig. 84— Compression Gauge
all cylinders because an engine with uneven compression cannot
be successfully tuned. Fig. 84.
If the engine shows uneven compression, check to be sure that all
valves have the proper clearance. If a valve is found with improper
clearance, set it at the recommended clearance and re-check the
compression. If the engine still has uneven compression, it would
mean that it either has burned, or sticky valves, leaky cylinder
head gasket or leaking rings, or worn cylinders, in which case
the trouble would have to be corrected before the engine can be
successfully tuned.
Spark Plugs
Remove the spark plugs and check to see that they are all the recommended
plug for the engine.
Type K 11. This is important because of the various heat characteristics
of the different plugs.
Clean the plugs or, if necessary, replace them and set the gaps
to .032" to .035", using a round
Fig. 85— Spark Plug Gap
feeler gauge for accuracy. All spark plug gaps must be the same.
Fig. 85.
Distributor
Remove the distributor cap and rotor and check the breaker points,
clean, or, if necessary, replace.
Hand crank the engine until the breaker arm cam follower is on
the peak of the cam. Adjust the breaker points to .018", using
a feeler gauge for accuracy. See Fig. 86.
Check the automatic advance mechanism by turning the distributor
shaft in a clockwise direction to see that it is free and that
the springs of the automatic advance mechanism return the cam and
shaft to its retarded position when released.
Fig. 86— Breaker Point Gap
Check to see that the vacuum spark control operates freely and
is in its full retarded position.
Set the octane selector to "0" on the scale. See Fig.
87.
Check distributor cap and rotor for carbon streaks and cracks and
check the spark plug and